
7·
6 days agoEh. The days of DIY printers both costing less and out performing are a thing of the past. I would argue that Vorons are more capable than say a Baubu, but I digress.
Eh. The days of DIY printers both costing less and out performing are a thing of the past. I would argue that Vorons are more capable than say a Baubu, but I digress.
2.4 R2 owner chiming in. I built mine about 3 years ago after window shopping for a year.
Why Voron in 2026?
Why not Voron?
Edit: final thought. IMO I do not find myself wanting for “tech” and there’s really not much missing from a Voron out of the gate. Nearly anything a Bambu can do is easily adopted to a Voron if you want to.
Self designed very specific objects are where it’s at regarding 3D Printing IMO. Once you get into the habit of realizing that you can print a part for <x> you’ll find yourself doing it again and again.
Examples I’ve designed and printed include:
You also find yourself being more adventurous with modifying other things knowing you can print interface parts. For example, our outdoor table had a 1.5" hole for umbrellas. We wanted a larger umbrella, which requires a bigger hole, so I cut a portion of the metal center of the table out and made a plastic adapter. I’ve also done lampshades and a bunch of other odds/ends around the house.
lol, I see. Printer tuning is a very real struggle for some and it happens that tree supports are one of the things that you can run into.
In my experience, broken tree branches come from:
Obviously, these can all be a bit interrelated.
The support in this print is basically vertical (no crazy angles), I generally have great bed adhesion/my printer can mechanically make its gantry in plane with the bed/I run a bed mesh every print/I use klipper_z_calibration to get a consistent first layer, nothing’s warping and I’ve tuned my extrusion multiplier for this spool of filament, the support itself is strong due to its girth at the base and wall thickness, and CoreXY means that the support doesn’t really move unless the extruder is dragging some.
I agree. In fact, that’s what I tend to do - slice up a design by splitting the body/bodies and printing test pieces where tolerances matter. Things like latches, hinges, pieces that have to fit with one another, etc. I’m not sure how practical this approach would have been for this print due to its final orientation, but it’s a really good practice.
I think I got a bit too comfortable with things going per plan over my last batch of designs :( I’ll also admit to being in a bit of a time crunch. No deadline, but I have younger kids so time to model and print is somewhat limited. This is a good reminder that rushing can actually make things take longer in the end.
Massaging this print to fit wasn’t practical. Despite being off by 1% that’s still 2mm of material to remove over some pretty big spans. I did take a chisel to the cutout, but man is ASA tough. PETG is much easier to do that with lol.
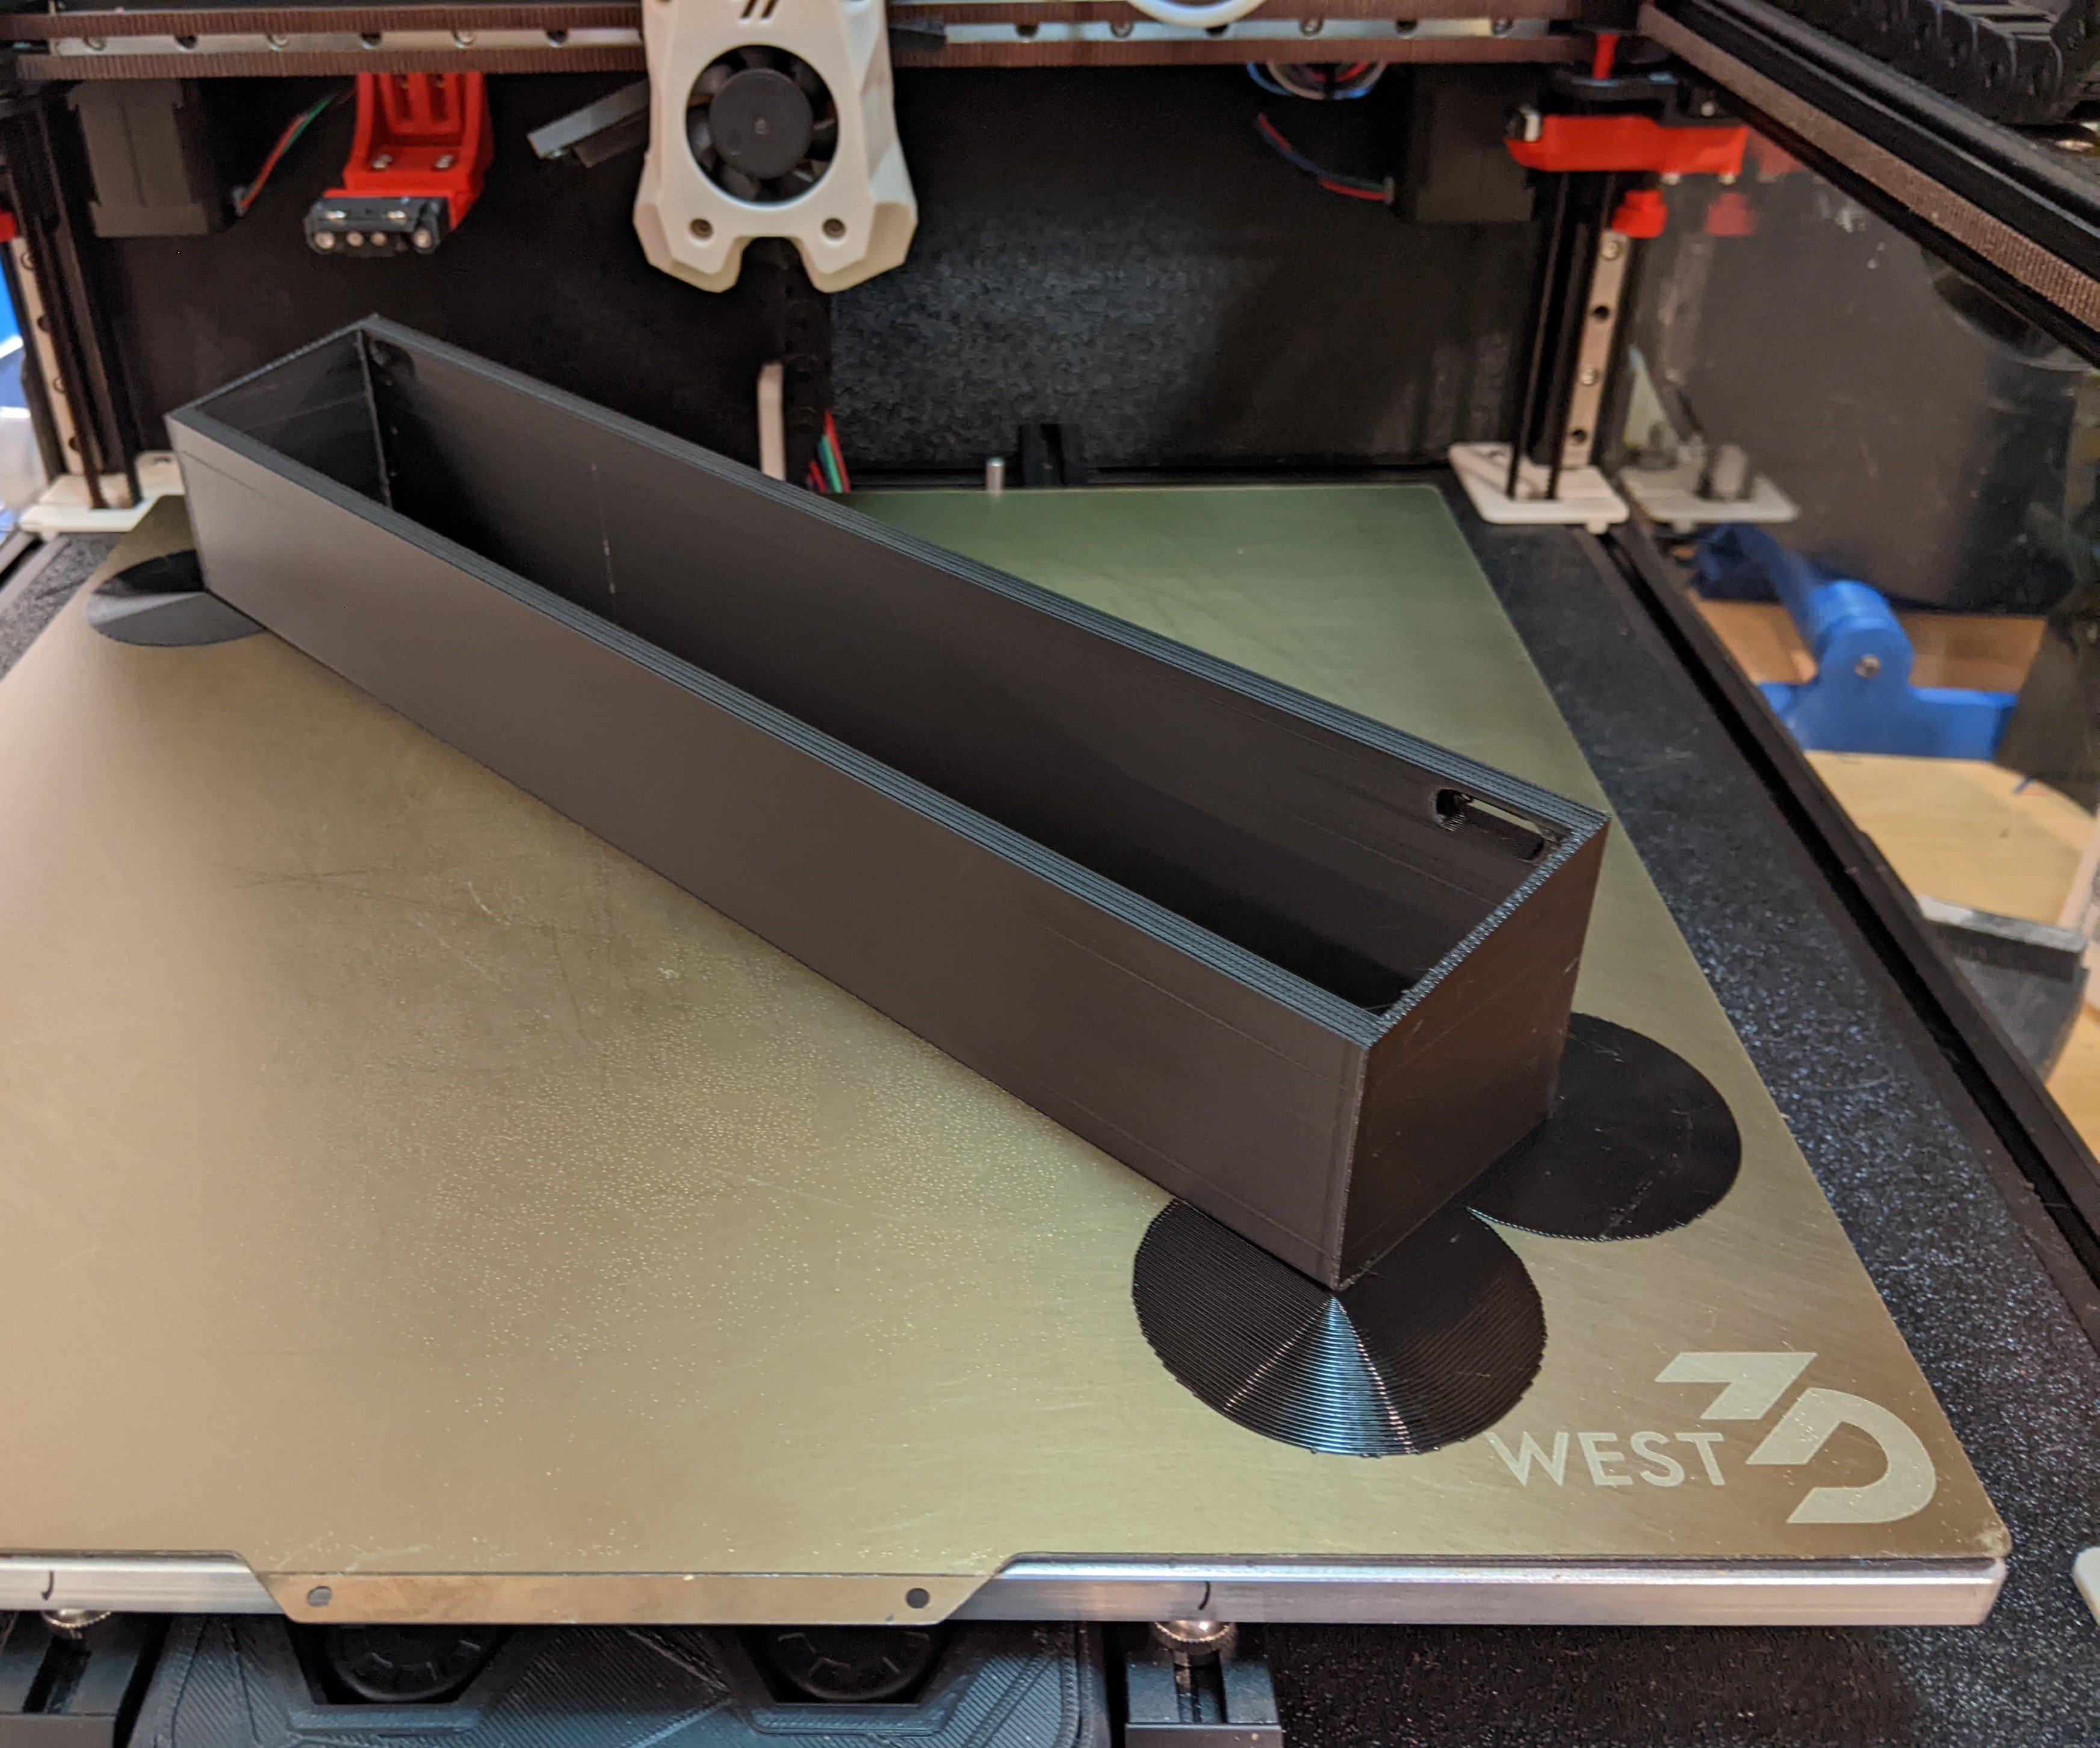
Thanks re: print looks great. It’s super solid, so I’m very happy in that regard. I don’t know about you, but lighting greatly impacts how the surface quality of my prints look. Hard/direct light at a steep vertical angle makes the faces look pretty rough, but more diffuse light coming from the side makes the parts look great. I am not sure if this is normal, especially for a larger CoreXY with long 6mm wide a/b belts, or if this is something I can dig into and improve.
I put this in another reply, but I know not everyone will pop back into the thread so…
I completely agree with your approach and that’s what I would usually do. The print is probably off by 1%, which over these spans is 2mm. Massaging this print to fit isn’t really practical :(
Sadly, almost is relative. The dimensions were off by say 1%, but over larger spans that’s 1-2mm.
I am not at all opposed to taking heat and/or tools to prints to massage them vs tossing the first go and printing fresh, but that wasn’t practical here :(
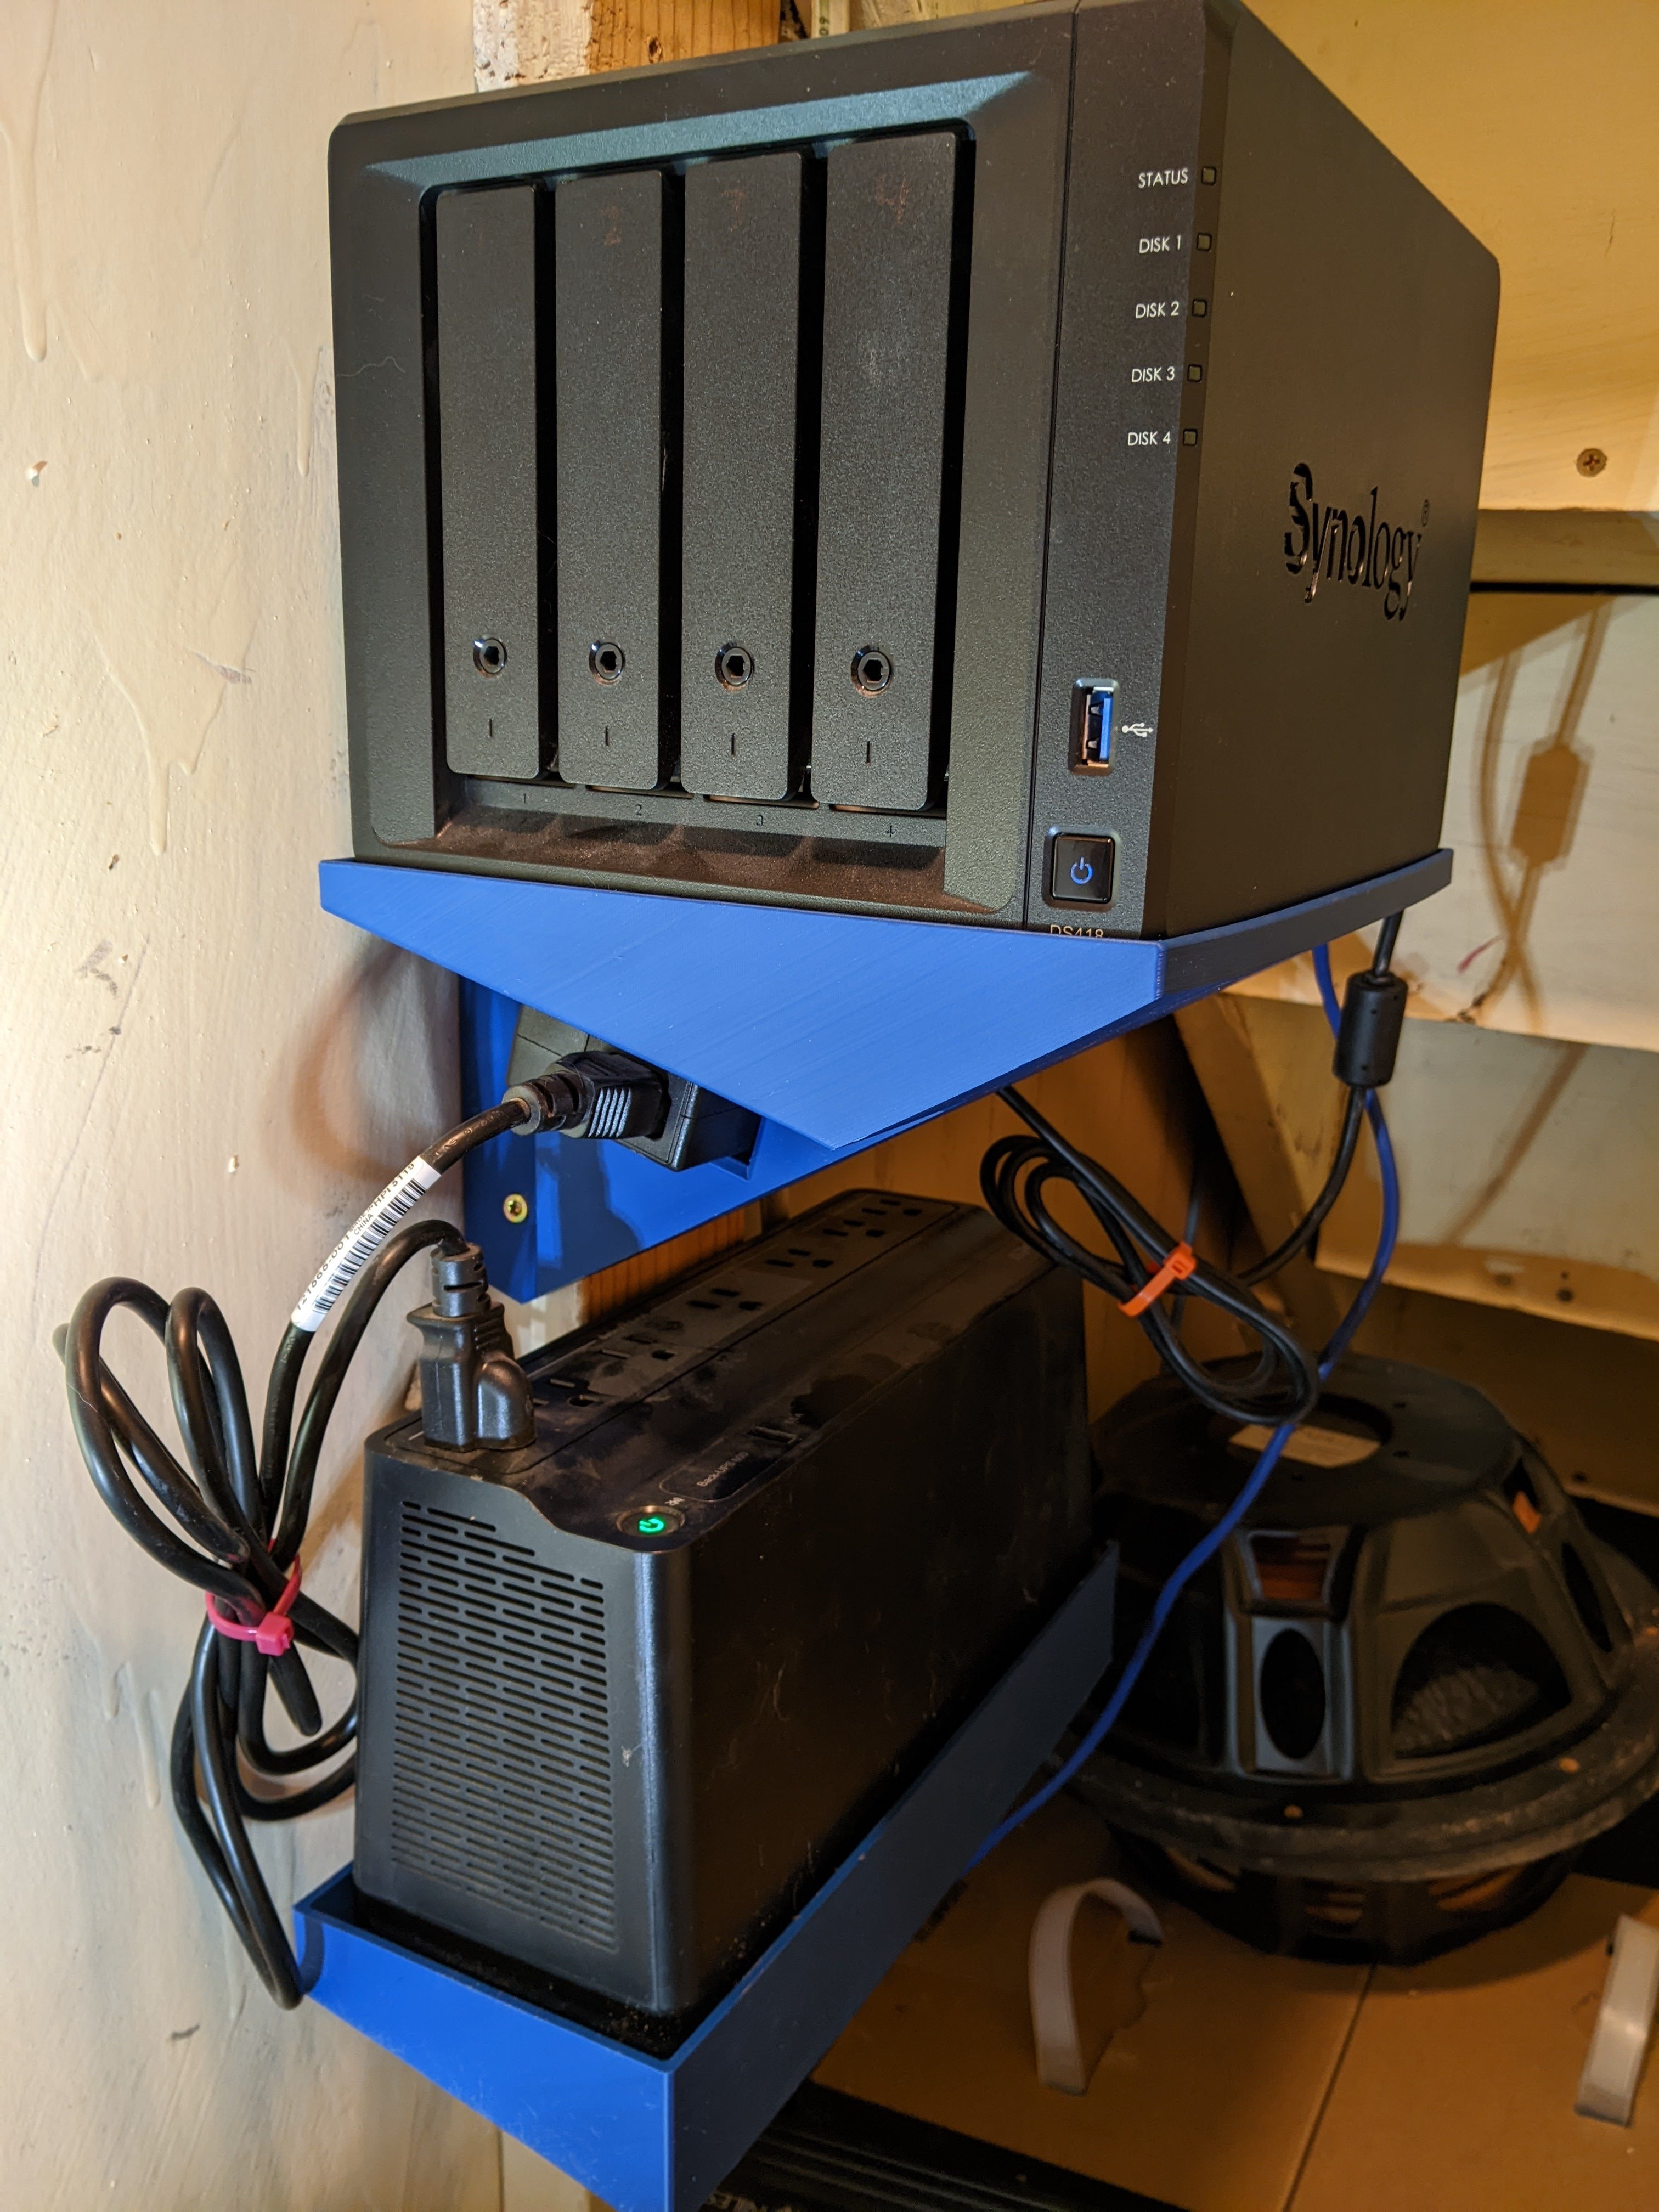
It’s a stand to somewhat elevate and angle the speakers I used with my computer.
I’ll follow up with another post in a day or two with the finished product.
My hobby space is largely in my basement. I have a 27" US General (Harbor Freight) roller cab + topper that stores a lot of my tools with the exception of tools I use for automotive work. Those live in my garage in a second topper. You’ll never be able to beat the density of a toolbox and the drawers really help with organization (the hammer drawer, the measuring drawer, the pliers and what not drawer, the cordless tools drawer, etc).
I have a partial wood shop in my basement that includes a DIY work bench. It has a number of large (24" x 30") pull out shelves in the middle for hand tools. Pull out shelves are amazing.
My printer lives on top of two stacked IKEA LACK tables. From a concept perspective, it’s nice. It gives a space under the first table and a shelf for printer things like filament, a dehydrator, etc. In reality, the stacked LACKs are super wobbly and more tightly spaced shelves would be more practical. I want to add pull out shelves to it, which should help give it more rigidity, but I might just build a printer stand from scratch.
So basically… pull out storage that stacks is great.
Ah, that’s true. I guess they carried over into the early spring steel era.
Related: clips are a much better option than using double sided tape to attach glass to your bed. I just pulled my wanhao i3 clone out of retirement for my kids to mess with and getting the beat up ultrabase bed off was lots of fun…
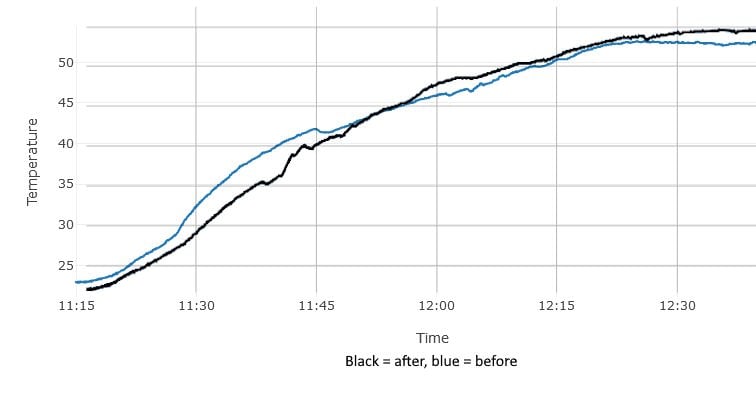
The printer is a 350mm3 Voron 2.4, so the scale of photos of things on the bed is a bit off. I swapped to ACM panels and added radiant insulation after my last big print lifted the bed. All was well until this one, but I also haven’t printed any larger rectangular things recently. Printing this 240mmx280mm thing flat lifted the mag sheet.
I’ve been printing long enough to remember binder clips. IIRC they were originally a reaction to the magnetic sheets originally used getting significantly weaker as temps go up. I would be pretty surprised if clips would help in this case, due to the forces involved thanks to the size of print, but it would never hurt to try I guess.

At worst? Ever so slightly stoke voter outrage at this whole fiasco and increase awareness of the oligarch class.
At best? Fines, jail time, reinstatement of disbanded agencies.
Nothing in the at best camp is likely to happen, but making a spectacle out of it and potentially getting someone to admit something they don’t mean to will likely help nudge some voters. Even if they’re mostly left leaning getting more people to turn out will help.
Cool, thanks! I will give it a try when I print the mirrored version of this thing.
That’s an interesting suggestion. What failure mode have you found that to help with? I am under the impression that the temperature gradiant between the bottom of the print and the top of the print, combined with thermal expansion, is the reason why printed parts warp. ABS/ASA expand/contract twice as much as PLA.
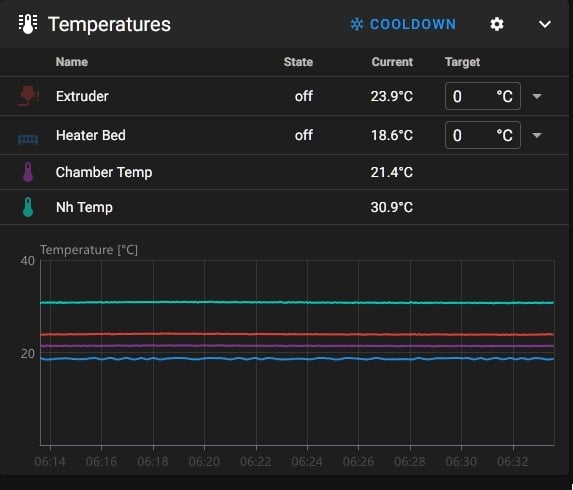
Vent and filter! I have one of these under the bed and the printer is vented.

As someone with a foot in Windows and Mac, they both suck for different reasons and you’re trading pain in one for pain in the other.
Windows sucks because of all the stupid one drive and AI garbage. No, I don’t want my desktop and tons of other directories in one drive, stop asking me. The constant migration of settings out of control panel is maddening. Windows 10 end of life is fine, but cutting off older PCs from windows 11 for “reasons” was an absolutely horrible choice.
Mac is fine if you do super basic computing, but if you want to do much of anything it’s very annoying out of the box. Window management is annoying unless you get an app like magnet, the ribbon can’t be displayed on dual monitors and there’s no way of fixing the primary monitor, keyboard shortcuts are inconsistent across applications like command delete and keyboard shortcuts in general suck (command + shift + 3-5), the OS greatly dislikes network storage, etc etc. Macs were somewhat isolated from marketing needing a “new” OS every year until recently. Now they’re in the change for the sake of things to list on the new OS page trap.
Linux isn’t without fault, but my experience has been much more pleasant.
This is a very easy to follow guide that walks you through everything but temperature towers in a sequential order: https://ellis3dp.com/Print-Tuning-Guide/
Late to the party, but…
How well tuned is your printer? This whole print is a torture test with lots of retractions and thin walls. For things to go well you will have needed to dial in flow rate, print temperature, cooling, and retraction. As someone else said, if the nozzle catches on an unsupported lever arm (aka one of the vertical pieces before a horizontal bridge has been completed) it can/will break it off.
If your printer has never pulled off this type of print before I suggest running through some basic tuning tests before worrying about potentially wet filament unless you live in a very humid environment. I live in a temperate climate where it doesn’t generally get that humid. My printer and filament live in my basement, which has a dehumidifier in it. I’ve never dried a role of filament and I leave spools unfinished for 6+ months. That’s not to say that you never should dry your filament or that doing so won’t improve print quality. I’m just trying to say that I have not experienced a higher rate of print failure with older spools.

This is disappointing. Not because it’s normal, but because so many photos of prints you see on the web extolling print quality are in ideal lighting. It’s misleading at best. I will say surface quality is oodles ahead of my old I3 clone, but this has always miffed me.
I do tend to print in chunkier layers. Also thicker extrusions and nozzles…
It doesn’t really bother me as my prints are functional, but there’s always been this nagging thing in the back of my head regarding surface quality relative to what folks on the internet present they achieve. The photo in this post is guilty of this TBH. The print looks way worse on the bed thanks to a taller printer with top mounted lights resulting in a steep lighting angle relative to vertical surfaces. It’s like going on a picturesque trip only to find out that all the photos you’ve seen online take a lot of liberty with timing (ie super early/late in the day) and/or framing.